|
~ Baseball Throwing, A Skill Forever Linked To A Players' Success Level In The Game! ~
Baseball throwing advanced; Observing and working with young players for the past 40 plus years, that part of the game which requires the most time spent with it, is throwing. Quite often, it has the least amount of time spent, leaving players to develop by playing catch to warm up before practice and games.
Throwing is a skill that will be forever linked to a players' success level, and enjoyment, within the game.
Throwing correctly and safely is a teachable skill; but one which requires patience, as it often times means convincing the player that they need to change what they have been doing.
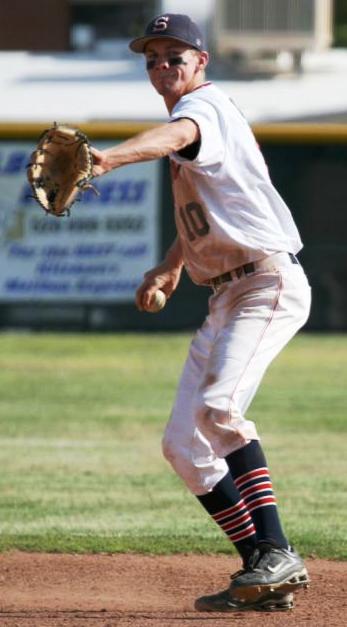
The phrase, "but I've always thrown this way", is heard more times than you might think. Taking time to work through that thought process, is well worth the effort, to make throwing more successful and safer for the individual.
How many young players have you seen throw a ball with little accuracy or velocity?
How about players who have sore arms, or throw sidearm?
These situations are everywhere; but the good news is it is possible to increase a players accuracy and velocity while teaching them to use their body effectively, efficiently and safely.
If a player has trouble throwing and receiving the baseball, their opportunities to play are very limited. The only position developed solely on hitting skill is the DH. All other 9 positions in the line up require some mastery of the throwing and receiving combination.
The program which follows will enable any player to make more efficient use of his body, become a more effective player and increase their chances for success in the game.
Stretching Your Muscles Is Warming Up. Think about playing catch before practice and games, not as warming up; but as working on throwing and receiving mechanics.
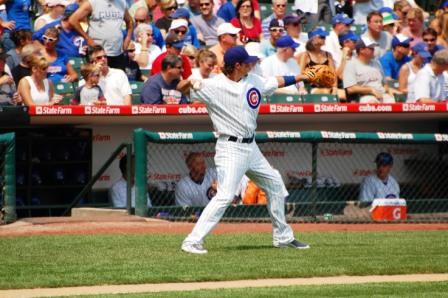
Have players give a chest high target, work on getting a 4 seam grip out of their glove, move their feet, don't reach, and keep the ball in between 4 points:
- Button on the top of their cap
- Outside edge of each shoulder
- Belly button
The opportunity is already built in every day to improve accuracy, quickness, and velocity . Increased focus while playing catch will transfer directly to practice, or the game!
Photo Bill Stanton: Checkswing.com
Throwing Tips ~ From the Dugout

- Provide an organized, purposeful throwing routine for all players.
- The same routine can be used in practice, then carried over as a game day warm up.
- If you value this warm up time as an opportunity to improve their skills, they will also.
- Skills that can be worked on: Moving to the ball, quick feet, catching the ball with 2 hands, 4 seam grip out of their glove, elbow up, stepping on line, crow hops, quick hands and accuracy.
- Team unity and confidence. When you see a team warm up, you can tell immediately whether they know what they are doing or not. Many teams line up and casually throw for a random amount of time, carrying on conversations unrelated to baseball, often playing "fetch", not catch. This warm up time is the ideal place to set the mood for the practice or game that is about to take place.
- Approach warm up time as a matter of team pride, providing your players with a mental and physical edge on their opponents, setting them apart.
The Right Results Come From The Right Approach
Steps To Throwing Correctly
Four Seam Fastball Grip

- The horse shoe that you want your players to grip across. The 4 seam grip gets its name from the rotation of the seams, when thrown. That rotation keeps the ball on a straight, accurate track, providing the most velocity possible.

- The actual grip from behind, index and middle finger across the seams, with the thumb directly underneath.

- The grip from the side. Note the gap between the back of the baseball and the throwers hand. That gap allows for maximum rotation, higher velocity. If the baseball is jammed back in the hand, the throw becomes a change up, not a fastball.
Squared Up To Target

- Once a ball has been fielded, or a throw caught, the player needs to get his body squared up to his target, that is, glove side alignment: knee, ankle, shoulder, hip should be facing the target, with hands together at chest.
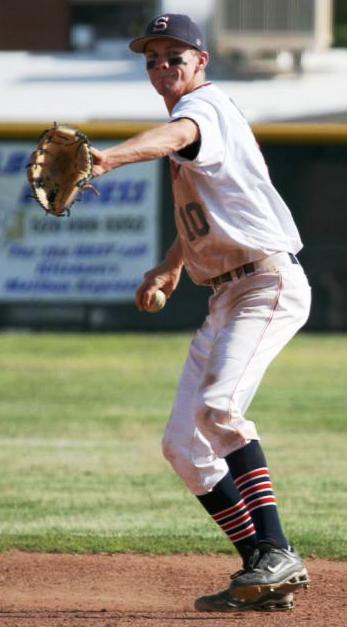
- Arm action. Hands come apart with thumbs under ( like cracking an egg ) while taking the thumb to the thigh, knuckles to the sky, elbow up high. In this picture, the player is almost to the power position. His glove is pointed at his target, body alignment is closed. He is about to take his knuckles to the sky, which will put his throwing elbow at shoulder height, the back of his throwing hand facing target.
Power Position
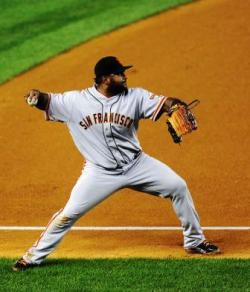
- Picture 1, throwing power position. Throwing elbow is at shoulder height, back of throwing hand facing the target, glove pointed at target, front foot has taken a small step, on line, directly at the target.
- The throw and follow through. Small step on line, hips rotate, tuck glove while letting throwing arm go with body. Stick chest out towards glove, head should never move off target.
Coaching Tips ~ Things To Look For
Are they dropping the ball to their thigh, or just coming straight back?
- Coming straight back drops the throwing elbow below the shoulder, leaves the front of the hand to the target causing the baseball to come out the side of their hand, ultimately robbing them of accuracy and any velocity they could generate.
Did they step on line?
- Stepping off line with their target side foot will cause their throwing elbow to drop, the baseball to rotate to the front and the ball to come out of the side of their hand. Over a distance, say from third base across the diamond, or the outfield to third or home, the ball will slice away and down from the intended target. On a play at first base, those throws take the first baseman directly up the baseline, in the path of the oncoming runner. Players throwing this way will quite often complain of soreness in their elbow. This is due to the increased pressure put on the elbow when it drops below the shoulder.

How was their power position?
- Was their body lined up, did they get the ball back and away from their target? At the power position, players have the opportunity in drill time or playing catch to visually check the position of the baseball.
- Often, even though correct to this point, as players start the ball forward, they will rotate the ball to the front first, not noticing that they are doing so. The second check they can make is to look at the spin on the baseball on it's way to the target. If it is spinning sideways, they have dropped the elbow. Either the thrower, or his catch partner can see the rotation and make the correction.
Additional Throwing Topics
|
Have A Baseball Related Question?
 Click the image to visit our question page and have it answered. Due to my increased coaching schedule, I would ask that questions be limited to the following categories: Baseball Instruction, Baseball's Mental Game and Defensive and Offensive Situations. Don't have a question right now? Maybe you'd like to browse through questions already submitted. Each question becomes it's own web page on this site. Step up to the plate and put the ball in play! It only takes a few minutes. Solid resources for other categories: Baseball Resource
|


